Multi Roller User Guide
Multi Roller User Guide
What You Need
🛑 STOP If you have not set up the Multi-Roller yet, please follow the setup instructions for your machine model before continuing: MIRA5 | MIRA7 | MIRA9
Need assistance?
Book time with a qualified technician and unlock the potential of your Multi-Roller.
Steps
- Plug in the machine and turn it on. Allow the machine to home
- Press the Z/U key on the keypad so that Z Move is highlighted. Then, press and hold the RIGHT arrow key until the table lowers all the way down and automatically stops.
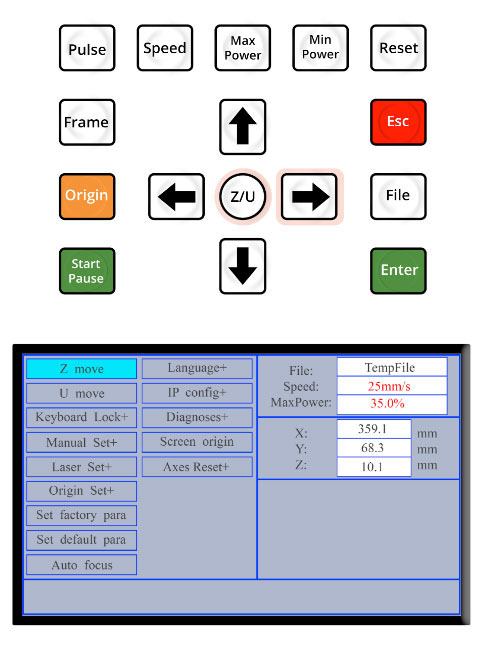
Keypad, Z Move is highlighted - Open the lid on the machine, and use the cabinet key to open the lower access door.
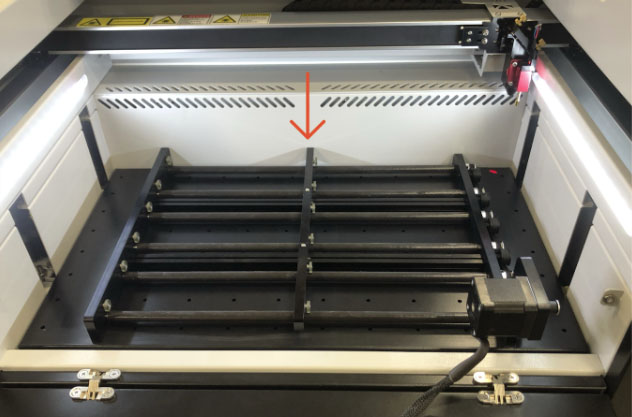
- If it is not already in place, position the honeycomb tray on the bed of the machine, ensuring it is pushed fully to the back of the machine.
📌 Note for MIRA5: If you are using a MIRA5 do NOT use the honeycomb tray while using the Multi-Roller. The Multi-Roller should be placed directly on the laser bed. At this time, if you are using the Multi-Roller in a MIRA5, remove the autofocus pin. (See: Autofocus Pin Resource)

Honeycomb tray on the bed of the machine - Lay the Multi-Roller onto the honeycomb tray. Position it so that it is pushed against the black rim of the honeycomb tray, but is NOT laying on the rim.
📌 Note for MIRA5: In the MIRA5, place the Multi-Roller directly on the laser bed and push it to the back of the bed until it is touching the back wall of the machine.
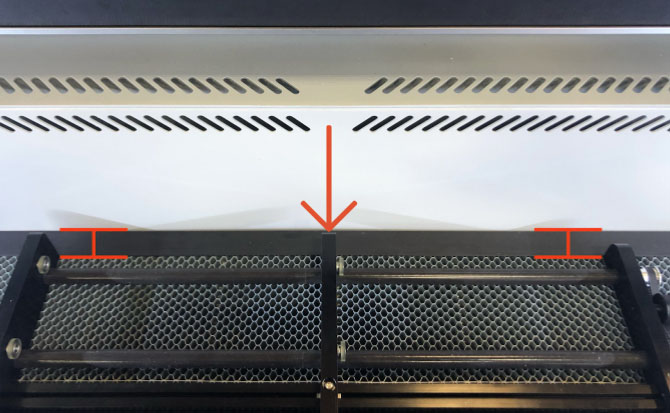
The center beam of the Multi-Roller should be centered on the bed - use the “arrow” created by the air vents at the back of the laser bed to find the center.
MIRA7 & MIRA9
Multi-Roller on MIRA7 & MIRA9 MIRA5
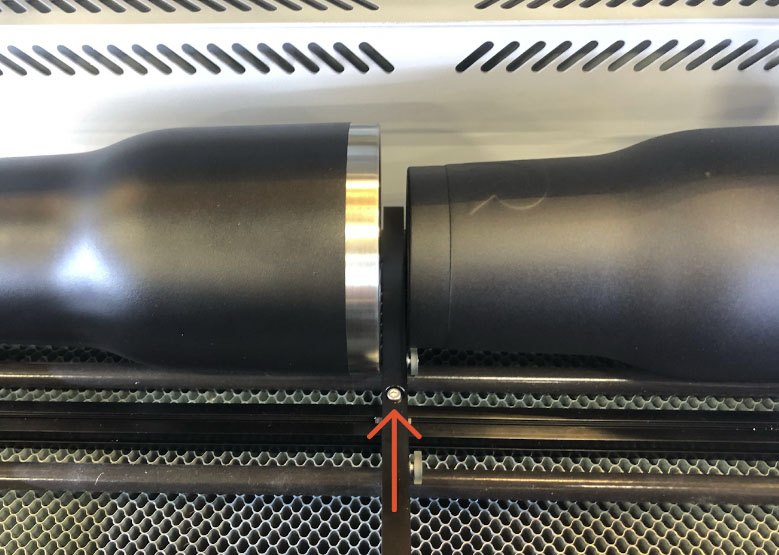
Multi-Roller on MIRA5 - Use an Allen key to loosen the two screws on the center beam of the Multi-Roller.
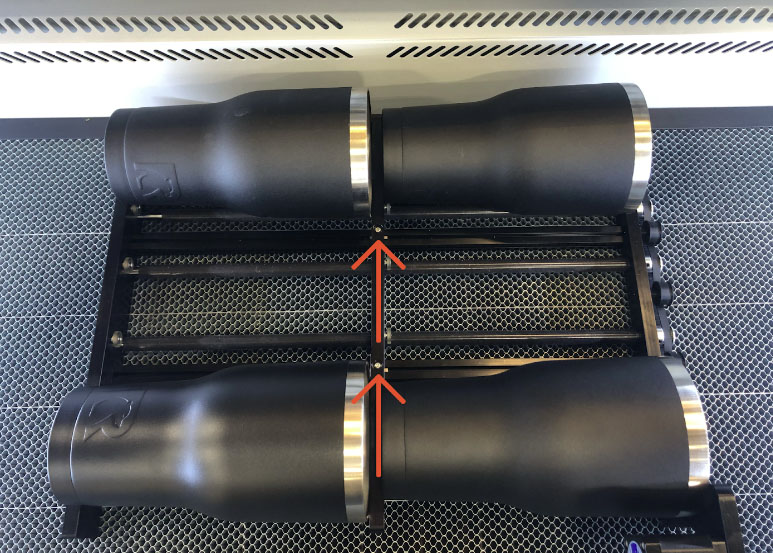
4 tumblers on Multi-Roller, 2 screws - Lay 4 tumblers on the four corners of the Multi-Roller, adjusting the center beam so all tumblers are snug.
- When the center beam is in the correct position, tighten the screws.
Screws on center beam - Load all of the tumblers onto the Multi-Roller.
- Rotate the tumblers so that the center of the area you wish to engrave is facing upwards.
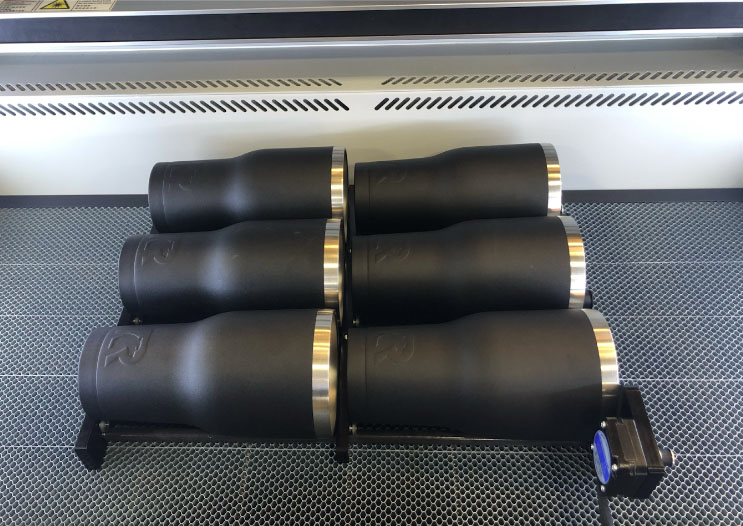
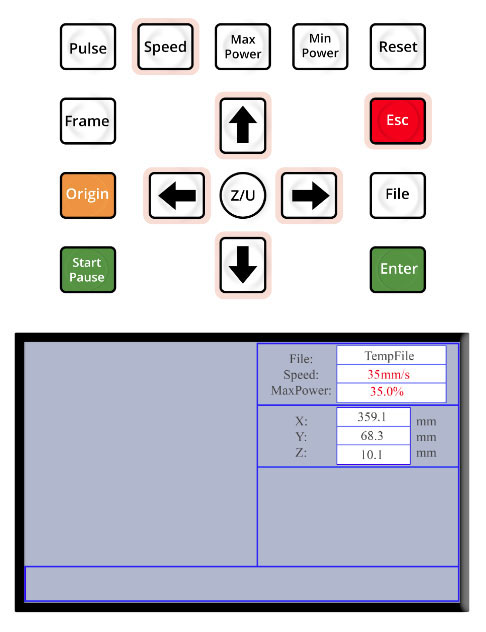
6 tumblers on Multi-Roller - Press ESC on the keypad to exit the menu, then press Speed to adjust the job/frame speed. Use the LEFT and RIGHT arrow keys to select which digit to edit, followed by the UP and DOWN arrow keys to increase or decrease the value. Set the speed to 35mm/sec, then press Enter.
Set the speed to 35mm/sec - Press ESC on the keypad to exit the menu. Use the arrow keys to jog the gantry so that the laser head is positioned over the middle of the tumblers in the rear row on the Multi-Roller.
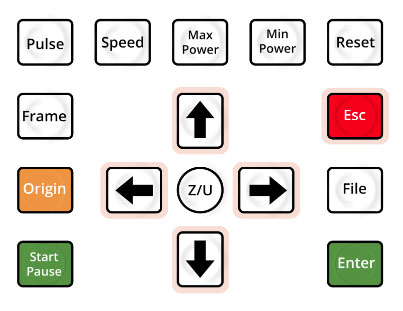
The keypad - Press the Z/U key on the keypad so that Z Move is highlighted. Then, use the LEFT arrow key to SLOWLY raise the table until the laser head is just a few millimeters away from touching the item.
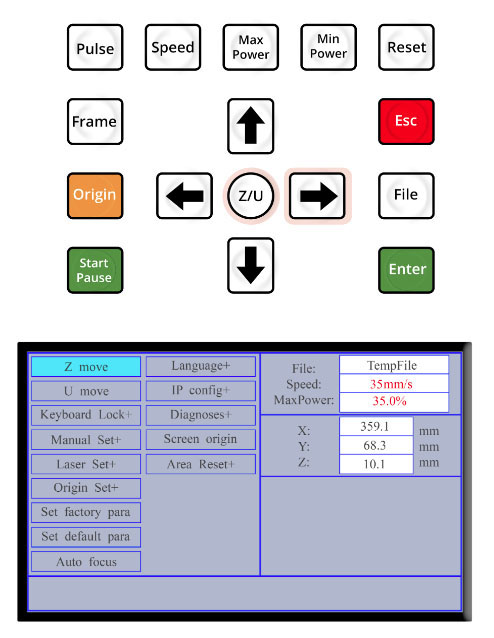
Keypad, Z move highlighted on screen - Manually focus the laser using the supplied manual focal gauge. Press the RIGHT arrow key to incrementally lower the table until the “step” for the desired focal distance* fits snugly between the workpiece and the nozzle, if necessary. (See: Manual Focusing MIRA)

Focus gauge between laser head and tumbler 📌 Note: A focus of 10mm is recommended for most tumblers.
⚠️CAUTION ⚠️Never try to raise the table with a focus gauge beneath the nozzle. The table should always be LOWERED into focus, not raised. Raising the table too high with the loaded Multi-Roller on the bed, can result in a collision.
- Plug the Multi-Roller into the plug port on the Super Box.
📌 Note: DO NOT plug the Multi-Roller into the machine Rotary Port used for the Smart Rotary.
- Route any excess cable so that it is out of the way of the laser beam.
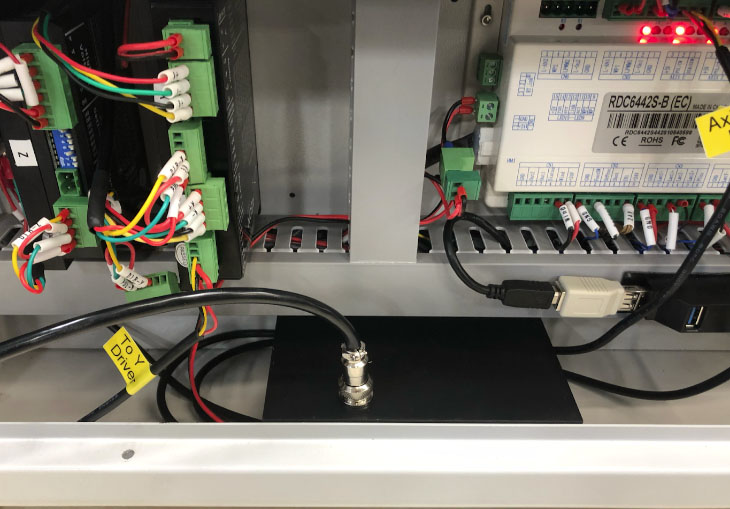
View of side panel with Super Box, Controller, and Drivers 📌 Note: Once the Multi-Roller is plugged into the machine, the UP and DOWN arrow keys will now control the rollers, NOT the gantry. Avoid pressing them at this time.
Related Articles
Multi Roller User Guide NOVA
Multi Roller User Guide NOVA Updated on Mar 21, 2025 Overview Learn how to use the Multi-Roller rotary with your Aeon NOVA laser Need assistance? Book time with a qualified technician and unlock the potential of your Multi-Roller. ? For the best ...Multi-Roller
Multi-Roller Updated on Mar 21, 2025 Getting Started with the Multi-Roller ? STOP: If you need to setup the Multi-Roller Slider, please view the Multi-Roller Slider Setup Guide before continuing. Step 1. How to Setup the Multi-Roller Multi-Roller ...Multi-Roller
Multi-Roller 7 Docs Multi Roller Setup MIRA5 Last Updated: 8th April, 2023 What You Need Multi-Roller Supplied Jumper Wire Cabinet Key 2.5mm Flathead Screwdriver 2.5mm Allen Key 20.5mm Manual Focal Gauge Laser Safety Glasses Laser... Multi Roller ...Multi Roller LightBurn Setup
Multi Roller LightBurn Setup Updated on Apr 08, 2026 LightBurn Settings Launch LightBurn on your computer. Ensure you are running version 1.3.01 or newer. Update your LightBurn at this time if needed. Plug the USB thumb drive that came with your ...Multi Roller Setup MIRA9
Multi Roller Setup MIRA9 Updated on Apr 08, 2026 What You Need Multi-Roller Supplied Jumper Wire Cabinet Key 2.5mm Flathead Screwdriver 2.5mm Allen Key 20.5mm Manual Focal Gauge Laser Safety Glasses Laser safety glasses, Manual focus gauge, Allen ...