LightBurn Setup For A Galvo Fiber Laser (Mac)
LightBurn Setup For A Galvo Fiber Laser (Mac)
What you'll need
- Computer with Mac OS
- Supplied USB Thumb Drive
Need assistance?
Book time with a qualified technician and get help setting up and navigating LightBurn.
Software and Driver Installation
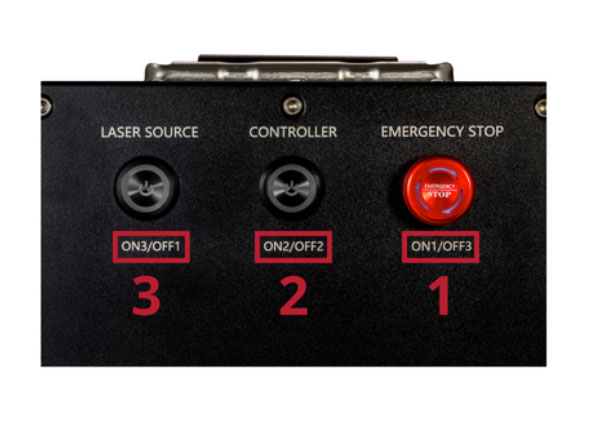
- On the fiber laser control cabinet, turn the laser on by pushing the buttons in the correct ON sequence.
Fiber laser control cabinet - If you have not already installed LightBurn onto your computer go to: https://shop.emplaser.com/a/docs/lightburn/lightburn-license-osx and follow the instructions.
If you have already installed LightBurn on your computer, open it now and continue to the next step. - Plug the USB thumb drive that came with your galvo fiber laser into an open USB port on your computer.
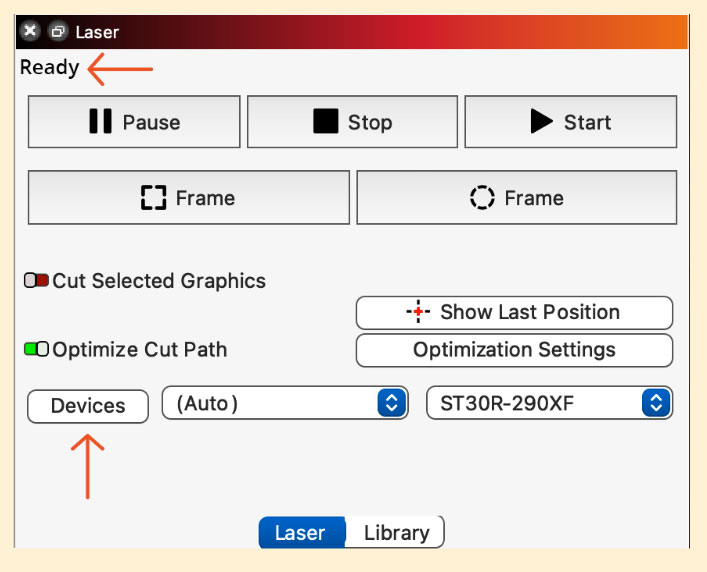
- If the Devices Window does not popup, click on Devices in the Laser Window.
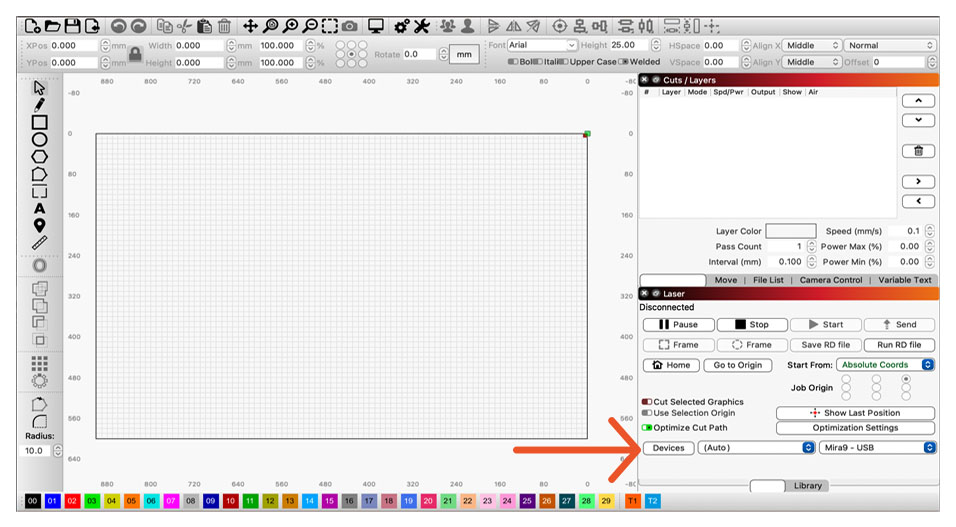
Devices button in Laser Window - In the Devices Window, click the Import button.
Devices Window - Navigate to the DISK_IMG drive.
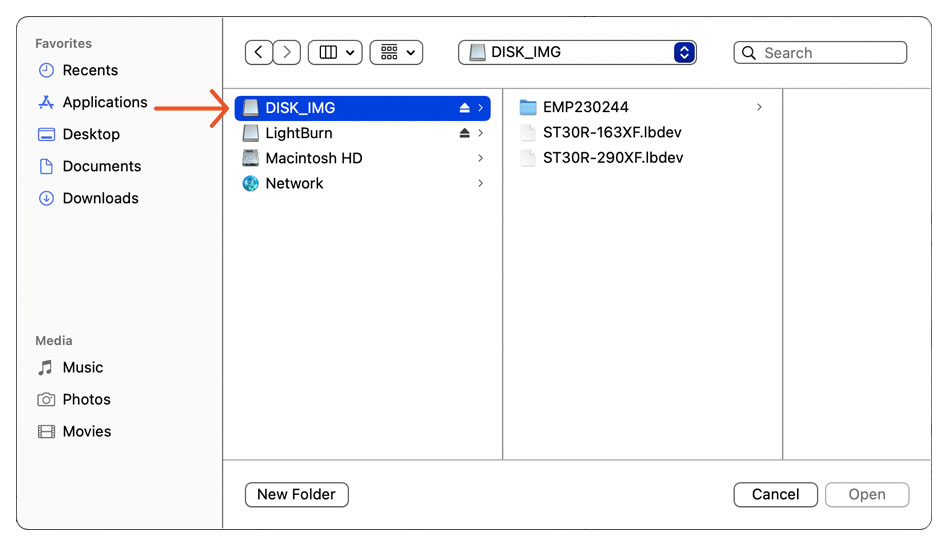
DISK_IMG drive - Click on the EMP folder.
- Select the file ending in .lbdev that corresponds with the lens that is currently installed in the Galvo Fiber Laser , and click Open.
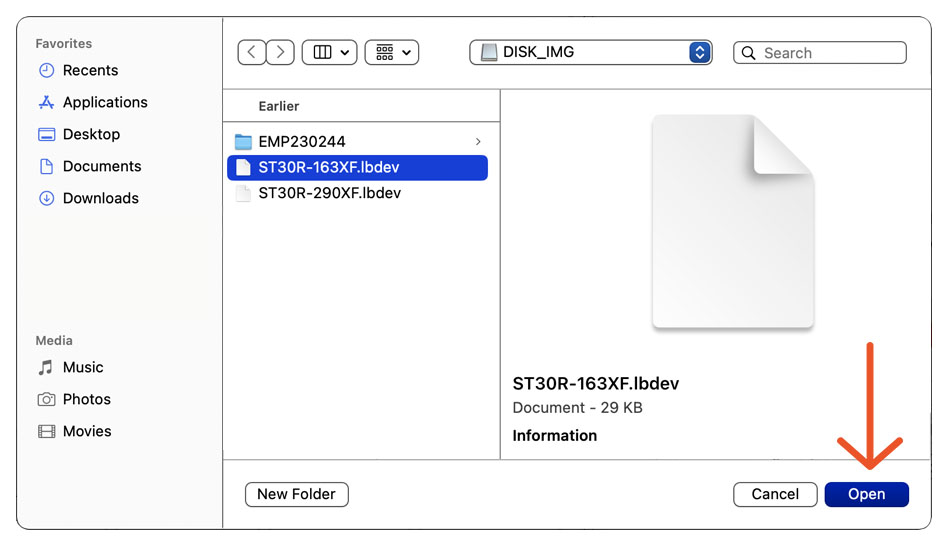
Select the file ending in .lbdev Note: There are multiple .lbdev files on the supplied USB Thumb Drive. These files represent the optional lens sizes available for the EMP Galvo Fiber Lasers. If you purchased additional lenses, repeat these steps to set up a separate device for each one.
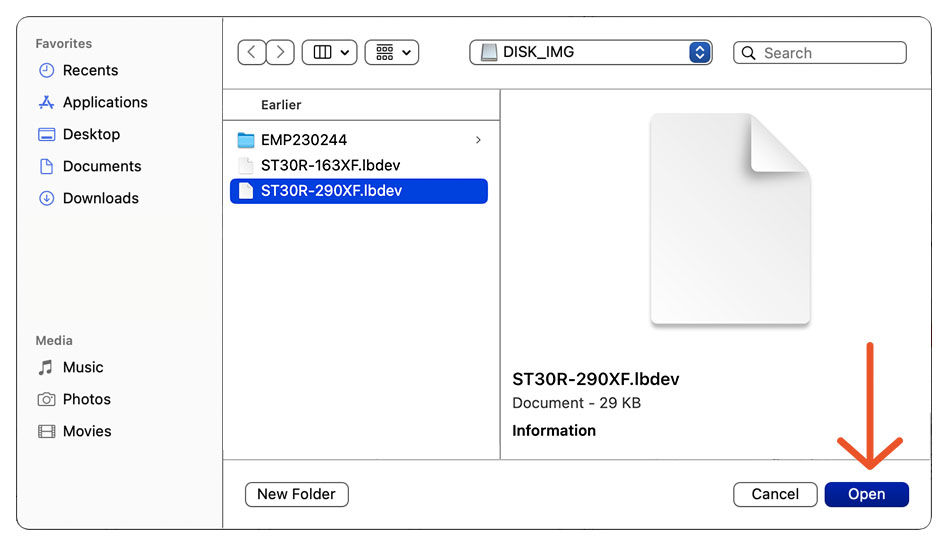
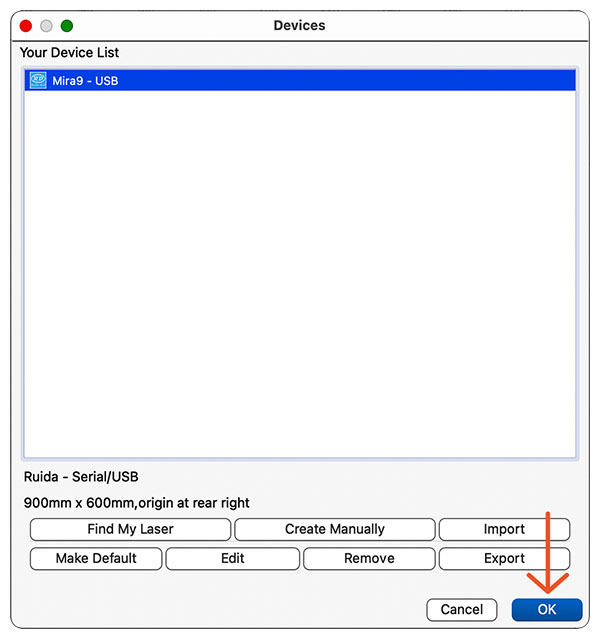
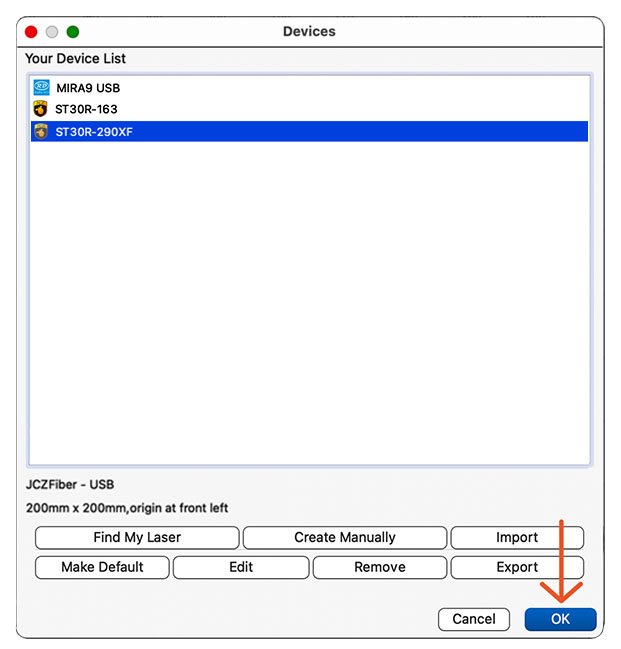
Select other files ending in .lbdev - Select the new device from the Devices list, and click OK.
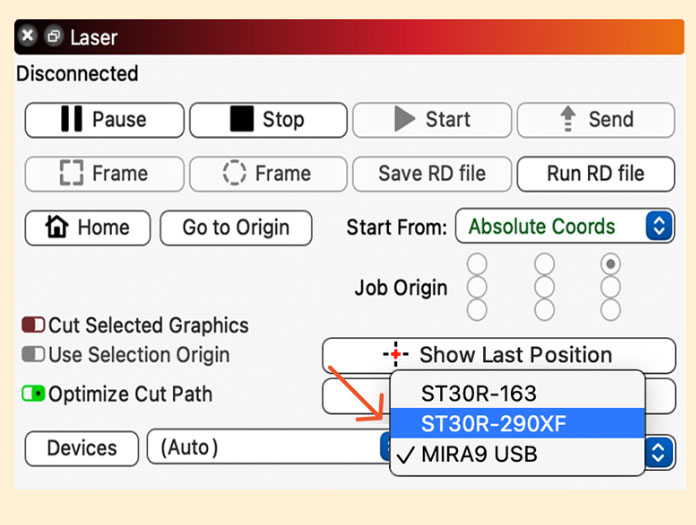
Devices List - In the Laser Window, select the new device from the Devices dropdown menu.
Laser Window - Plug one end of the USB cable that came with your laser, directly into an open USB port on your computer.
- Plug the other end of the supplied USB cable into the USB port located on the back of the cabinet.
- In the Laser Window, right-click the Devices button to reset the connection. It should now say Ready.
Laser Window
Congratulations! LightBurn is now paired with your Galvo Fiber Laser!
Related Articles
LightBurn
LightBurn 9 Docs LightBurn Setup Using Free Trial - Before Your Machine Arrives (Mac) Last Updated: 10th March, 2023 What you'll need Apple Computer Internet Connection Need assistance? Book time with a qualified technician and get help setting up ...LightBurn Setup For A Galvo Fiber Laser (PC)
LightBurn Setup For A Galvo Fiber Laser (PC) Updated on Apr 09, 2026 What You’ll Need Computer with Windows OS Supplied USB Thumb Drive Need assistance? Book time with a qualified technician and get help setting up and navigating LightBurn. Software ...LightBurn Setup Using LightBurn License - After Your Machine Arrives (Mac)
LightBurn Setup Using LightBurn License - After Your Machine Arrives (Mac) Updated on Apr 09, 2026 Overview Setting Up Lightburn Using Your Personal Activation Key After Your Machine Arrives (Installation Process and Loading Device Profiles) What you ...LightBurn Setup Using LightBurn License - After Your Machine Arrives (PC)
LightBurn Setup Using LightBurn License - After Your Machine Arrives (PC) Updated on Apr 09, 2026 Overview Setting Up Lightburn Using Your Personal Activation Key After Your Machine Arrives (Installation Process and Loading Device Profiles) What you ...LightBurn Bridge Setup MIRA
LightBurn Bridge Setup MIRA Updated on Mar 21, 2025 What You Need LightBurn Bridge Micro SD Card Power Plug Ethernet Cable Computer Internet Connection USB Thumb Drive Need assistance? Book time with a qualified technician and get help setting up a ...